HomeAboutFreebies

Thursday, May 31, 2012

Save that page...

Hi everyone,

Hope you didn't miss me too much. Oh who am I kidding I hope you missed me a ton! Obviously life got pretty complex for me in the past two months and I have been a bit MIA. No blogging, and no reading blogs. OMG, I can't tell you how many kinds of busy I was. However, last Thursdays the kids let out. On Friday, with the help of several colleagues I was able to pack up my room, again, and close up shop for the summer!

Pack up? Yes, remember I was away for relocation. Now I have to wait 2 full months before I can move back into our building and rebuild my class in a new space. I had some great ideas to post about and yet, I was unable to snap any pictures. So they have been tabled until a better time. So I am now on vaca, but truthfully teaching and my classroom is never too far away from my thoughts. So here I am on my 6th day of summer vacation, siting in a professional development on a 15 minute break writing to you!

I was reminded of this activity/ strategy while I was packing up my students reading anthologies. This is a simple yet very effective strategy to have your students mark their page in their book. In simpler terms, a book mark.

My students reading anthologies have multiple stories in them and it is very time consuming to help all those little hands find page 52 or 97. So one day I just gave them all one of my favorite school supplies, sticky notes!

I have a number system in my room where my students are each assigned a number. So I started by numbering sticky notes and adding one to each anthology.
 When I passed out the books and introduced the sticky note process I had the kids put the sticky note at the start of the story we would read. Then after reading they would stick it at the start of the next story for easy page finding.
 It has made my life and my students lives so much easier when we are ready to read.

If your still in school I hope this helps.
If your out for summer break... Congrats!

Either way I optimistic about writing more often this summer.

Thursday, April 26, 2012

Student Art Feature: Strike a Pose

Wow, it certainly has been a while since I have written for you all. I have been consumed with other things recently but was reminded today that I have readers who enjoy well, reading my blabbering. So here I am, better late than never right?

It's been a difficult year but it looks like things are looking up for next year. I will cross my fingers that if anything changes in staffing for next year that is is for the better.

I good news, I get to be in one school next year, instead of two. Please understand that both schools I was at this year were great but it really takes a toll on you when you are working out to two places. The rough news is that instead of 3 ELL teachers my school will have 2. Looks like I'll be teaching not just Kinder & 1st but also 2nd & 3rd grade. The good news for you is that there should be a greater variety of materials to be found on here.

We have less than a month left of school and I can't wait. I am getting ready to start my end of the year pirate fun and that is always a blast. We even have a plan day on Friday and I have some things to create planed at work. ;) I'll be sure to share.

Sooooo, one of my favorite things to share with you is the student art I find displayed proudly in the halls. Today I found these fab art pieces.

In an effort not to forget to take pictures for you all I dragged my students with me when I took these pictures. I asked them to tell me about the art. They described the positions and we guessed what actions we though was being portrayed. Then spontaneously they started to strike a pose too! It was wonderful.

Here were a few of the kids favorites.


How it was created? It is all out of construction paper. One whole sheet for the background. Two accent colors cut into different rectangles and squares with rounded edges. Finally, use black construction paper for the body.

If you make any of these I would love to see how they turn out.
Have a great rest of the week!


Wednesday, April 18, 2012

Teaching, Filmmaking and Lime Jell-O


Ms. M asked me some time ago to contribute to her blog, and though I am not a teacher, I'm giving it a shot. For inspiration, I paged through some of my old elementary school yearbooks from the mid-1970s. (Or “classbooks,” as they were officially called, probably to distinguish them from bigger, fancier high school yearbooks.)

I got to thinking: What makes a great elementary school teacher?

As I've often mentioned on my own blog, I went to a public school in rural Florida, in an area that was fast changing from cow pastures and orange groves into suburbia. I was surrounded by a mixture of kids, from those whose parents worked in the groves and on the ranches to those whose parents commuted into Tampa. The demographics created some interesting cultural clashes, but that’s another story.

I may not remember the entire periodic table of the elements, or how to do long division, but I do remember all my teachers. I suppose most of us do. It’s amazing how readily a child’s brain absorbs and retains some information. (I suppose this is why I can still remember the plot of every episode of “Gilligan’s Island.”)

There was Mrs. Courbat, in the fifth grade, an older Southern lady who contributed very '50s recipes like Miracle Whip Chocolate Cake and Lime Jell-O Salad to our class cookbook. I suppose they would be fashionably retro at a party now. Or maybe not.

There was Mrs. Young, my second grade teacher, who I smacked on the behind one day as she walked past my desk. She hauled me out of my seat and smacked me right back. I suppose that response wouldn’t fly these days, but I deserved it.

There was Mrs. Simmons, our music teacher, who had us all sing “Free to Be, You and Me” and “On Top of the World.” Coach Johnson was my nemesis, because I hated sports, and he used to yell at me for daydreaming in the outfield.

But the teachers who stand out the most in my mind are those who seemed to really see me. They understood who I was and what distinguished me from the kids at the other desks.

My first grade teacher was Mrs. Westphal. At the time, I was fascinated by rocks. I had a burgeoning rock collection, mostly chunks of sparkly pink and gray granite retrieved from the local railroad track bed. Mrs. Westphal occasionally went to rock shows – I think someone in her family was a collector – and she would often buy an inexpensive rock or two and bring it to me. A quartz crystal, maybe, or a piece of flaky mica. I always appreciated the fact that she noticed my hobby, and saw me as special enough to give me a gift.

My third grade teacher was Mrs. Pope. She was always a favorite, mostly because she was a nurturer. This was around the time my parents got divorced, and while I don’t have specific memories of Mrs. Pope’s class, I think she provided warmth and stability at a time when I felt neither. It’s not that we ever spoke at length about the divorce – but she did spend time with me, and again, seemed to really see me, not just as another kid but as an individual.

Finally, there was Mrs. Eisenstein. At this particular school, students who were recognized by teachers for their academic abilities, and then managed not to embarrass themselves on an IQ test, could be deemed “gifted” and sent to a special class. In fact, that’s what we called it – Special Class. Mrs. Eisenstein taught Special Class.

She was a favorite because she really, really challenged us. And it wasn’t the kind of challenge that makes you roll your eyes and blow the dust off the cover of some thick, cumbersome research book. It was the kind of challenge that makes you come alive.

We made a movie in her class with a hand-held Super 8 camera. We wrote a script, fashioned costumes out of old, cast-off clothing and hammed it up during filming. I remember the story involved a ghost who flashed in and out of scenes – an effect we achieved by stopping the camera, having the “ghost” actor step out of the scene while everyone else froze, and then starting again. When we watched the finished product we laughed uproariously. It was a terrific project that taught me lasting lessons about cooperation and filmmaking, but we wouldn’t have won an Oscar.

We also studied mythology in Mrs. Eisenstein’s class. She made it come to life – a fascinating world of centaurs and minotaurs and gods and goddesses. Pretty amazing stuff for a third- or fourth-grader.

My point here is that it doesn’t take much to be a truly life-changing teacher. Giving kids a novel experience, sparking their imaginations and seeing them for the individuals they are makes a huge difference. I am indebted to all my teachers – even Coach Johnson, I suppose, though I hate to admit it.

(Photo: Me, in the fourth grade. I don't know why Gary, a classmate, wrote next to my picture that I had a bad temper. Fourth-grade sarcasm?)

Friday, March 30, 2012

Text to-Self

Ugh, I had this post all written and I lost it. That seems to be happening to me more often than not. :/ Anyway, I hope you all are doing well.

If you recall a while ago I brought you a Text to-Self activity. My students love this so much that I revived it.

My Kinder kids read Chicks and Salsa...
and completed this sheet.

My 1st graders read Snowmen All Year...
 and completed this sheet.

Hope you find them useful.

Saturday, March 24, 2012

Alec and Erica

Sounds like a cute couple. Ha, ha, or not, I don't know if the people they were name after would be interested in each other. First, one is real and fabulous and the other is fictional. However, I digress, I am here to share two new lesson plan templates for sale over on A Teacher's Plan.

Erica is names after the famous Erica Bohrer, of Erica Bohrer's First Grade blog. 
Here is a preview.

Alec is name after a character from a series I am currently reading, The Mortal Instruments, by Cassandra Clare. I am in love, obsessed with them and their companion series, The Infernal Devices. Wow did I go off on a tangent.
Anyway, Alec is my largest premade template to date, a 4 page template. Here is a preview.

Please go to A Teacher's Plan to read more about both of these NEW pre-made templates, made by... ME!


FYI, coming soon...
A few of my favorite bloggers are going to guest post on here. Can't wait to see what they share.


Friday, March 16, 2012

Anchor Chart Linky Party.


I am pretty frustrated because I lost the fabulous post I spent an hour writing last night.

So this is not my original post but hopefully you will get the gist. Here is a bit of a post I posted about a month ago sharing how I teach my Kinder ELL  kids how to use beginning, middle and ending leads/ sentence starters/ transition words in their writing.
I teach leads as "Story Starters". They "lead" the story, like our line leader. We talk about good ways to start a story and how it is pretty boring to always start with "I". "We", I, brainstorm possible ways to start our stories, out loud and create a list. I type the leads on my laptop and have my kids watch. I started doing this this year, because I realized my students weren't recognizing my anchor charts after I had typed them up. This way I have a clean poster that the students recognize. The story starters are mounted on green construction paper to match the train's engine. (For more on the color coding please visit the original post, Beginning, Middle, and End.)
In a few days time I introduce transition words. No surprise they are also color coordinated to match their cars.
I realized once I had them up I should have added the trains to them too. Oh well, they color will have to be enough.
Finally, (like my transition word?) I also print these on colored paper and place on the board for easy referencing.
Most kids won't use transition words. Only the really quick kids will pick up on it. However, I find that having them up and referencing them when I model writing really helps my students understand what I am talking about. They start to use them when they are talking, which is a fantastic side effect for me as an ELL teacher.
So a freebie for you... the transition posters. Just click on the links below to get a copy for your room.
If you have some time you might want to revisit the original post, as I share some writing tips and freebies.

Can't wait to see what you have to share with us. Please link up Kinder thru 2nd grade anchor charts below.


Please remember that if you have a 3rd thru 6th anchor chart hop on over to Kristen's blog to link up there. Just click on the button below.

Wednesday, March 14, 2012

Class Decor Help

I realize I still have a whole quarter, plus all of summer to think about this, change my mind, be inspired and then change it again, but I have gotten an itch. I have been thinking of what kind of decor I will use in my classroom next year. Am I the only one? Have I lost my mind?

I though I had this all settled. For the past 2 years, I have used a Rainbow Stars theme. It was perfect because I could use all of Creative Teaching Press Poppin Patterns Stars products. I love this theme, one because I love rainbows and stars, the perfect combination. I use a dark background, like navy or black and the rainbow boarders.

 Then Creative Teaching Press came out with the Dots on Chocolate theme and I fell in love all over again. Because I am in two different schools this year, I could try out my new theme... a surfing theme.

I fell in love with the surfing theme and was all too ready to continue this until I saw Schoolgirl Style's Lemon Chiffon theme.

I started to get an itch. I am totally in love with the grays and yellows this year and although I this color theme might be a bit more of a challenge, I could totally love it. However, I think I will wait a year or two until I can pull it all together. BTW, Schoolgirl Style is having a sale in her Teacher's Notebook shop today only, so if your interested, today might be a great day to purchase some goodies.

My real struggle is because of a recent trip to Hobby Lobby where I found these gorgeous rainbow stars on black boxes and matching ribbon.
 It made me totally want to keep my current theme. Now I am super confused. So I thought I would bring it to you so you could help me decide.
 
If you click on the images on the right it will enlarge a picture of the theme.

<a href="http://www.sodahead.com/fun/what-theme-would-you-like-to-see-in-my-class-next-year/question-2517905/" title="What theme would you like to see in my class next year?">What theme would you like to see in my class next year?</a>

I do ask that if you would like to leave a comment please do so in the Blogger comments section, not the Widget.
Thanks for your help.

Tuesday, March 13, 2012

Anchor Chart Linky Party!

Hi Everyone!
Have I got a goody for you!
Kristen from Ladybug Teacher Files

and I are collaborating to bring you an anchor chart linky party. 
So get your cameras ready, and start snapping pictures of your favorite, or most useful anchor chart.
Get ready to share on Friday, March 16th.

Because Kristen works with older kids she will host anchor charts for grades 3rd thru 5th on her blog, Ladybug Teacher Files.

I will host anchor charts for grades k thru 2nd on here.

 Hope to see you there.

Saturday, March 10, 2012

Organization Project Week 8: Thematic Units

It is perfect that the Thematic Units linky party opened today, because I spent the day working on organizing my thematic units. It was our last day before  our Spring Break, next week. I wasn't going to do any heavy lifting today, so I took advantage and put my practicum student to work... with the kids. While I worked on de-cluttering my teaching materials.

I got these fantastic tubs from Really Good Stuff, last summer. I have had plans for them for a couple of years now, and when I was able to get my hands on them, I didn't have time to put them to good use.
Until now...
As you can see they were just filled with random items I was trying to hide. I purchased 4 boxes so that I could have one for each quarter. So the first thing I did was empty them out and give them a fancy new cover page.
 I didn't want to laminate the sheet in case I was going to change them.
 However, I didn't just want to stick them on with tape.
 So I used a page protector.
I used different backgrounds, but I am pretty sure I will be changing them so they are all uniformed.

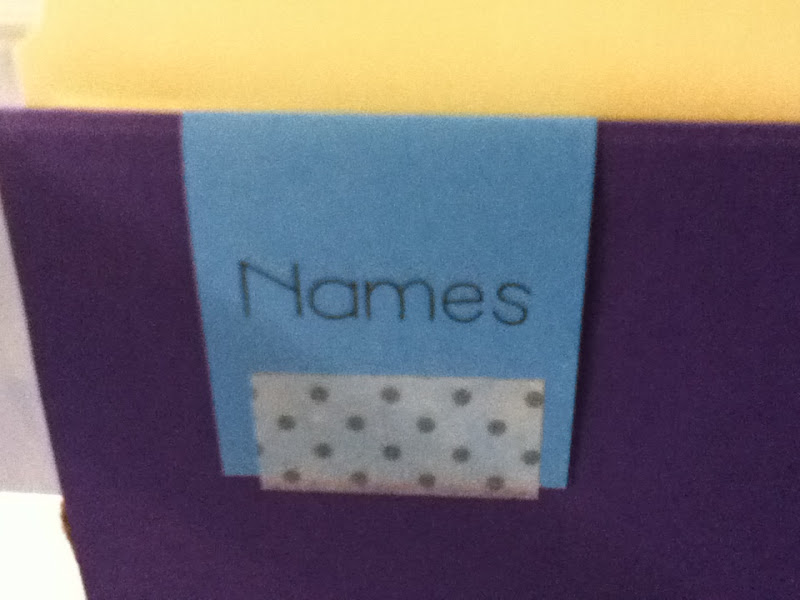
Next, I wrote out all the themes I could remember by quarter. Ie: Q1: Back to school, Names; Q2: Halloween, Thanksgiving, Veterans day, Holidays. You get the point. Then I used that information to create labels using Post-It notes, like Kristen showed just a few days ago.

 I would then attach these labels to my purple hanging files. What I didn't realize was that I did not want to put tape on the hanging files just in case I wanted to change them around. Regular tape would not work either. What should I use?

Some WASHI TAPE!
 
What I love about Washi tape is that it removes easily, so don't worry about mistakes. It is also pretty sticky, and is super cute.
I didn't have to stick the back down because that was the part of the sticky note that had the adhesive on it. It worked out great.

As a side note, I was going to stagger the tabs but I didn't like the way they looked. So I I left them all on the left side. So if I move any of the units around, the tab would not be out of place.

Finally, I was able to file away all of my great activities and units. What I did learn was that I did not want a box per quarter. I am going to change them so one is for the first semester, Q1 and Q2. The second will be for the 2nd semester, Q3 and Q4. The third box will be for the letters of the alphabet, Sight wd, and HFW work. Basically for Kindergarten. The final box will dedicated for phonics and parts of speech units. Mainly for 1st grade.
However, I am super happy that I got the bulk of it done and all I have to do is some rearranging. I did notice, as I was filing, that I forgot some units, so I will have to go back and make some more labels. No problem now, that Kristen made the template and explained it all for me. 
This is where I will start from when we get back from Spring Break.

Here is a final picture of them all stacked up and pretty. Please ignore the hot mess to the left and right. It is still a work in progress.


 What I love about this is that I will work out of one box and when that is done I can close it up and bring up the next one. No longer will I go crazy looking for a particular idea/ activity. Now it is at my fingertips.

The downfall? I can't add my books to the folders and tubs. However, I like the way I store my read aloud books. I just have to organize and label them better.
 However, this is a project for another day.

Don't forget to hop over to the Clutter-Free Classroom and check out all the other fab organization projects.

Have a great weekend. I hope to catch up with some more posting next week.