HomeAboutFreebies

Friday, March 30, 2012

Text to-Self

Ugh, I had this post all written and I lost it. That seems to be happening to me more often than not. :/ Anyway, I hope you all are doing well.

If you recall a while ago I brought you a Text to-Self activity. My students love this so much that I revived it.

My Kinder kids read Chicks and Salsa...
and completed this sheet.

My 1st graders read Snowmen All Year...
 and completed this sheet.

Hope you find them useful.

Saturday, March 24, 2012

Alec and Erica

Sounds like a cute couple. Ha, ha, or not, I don't know if the people they were name after would be interested in each other. First, one is real and fabulous and the other is fictional. However, I digress, I am here to share two new lesson plan templates for sale over on A Teacher's Plan.

Erica is names after the famous Erica Bohrer, of Erica Bohrer's First Grade blog
Here is a preview.

Alec is name after a character from a series I am currently reading, The Mortal Instruments, by Cassandra Clare. I am in love, obsessed with them and their companion series, The Infernal Devices. Wow did I go off on a tangent.
Anyway, Alec is my largest premade template to date, a 4 page template. Here is a preview.

Please go to A Teacher's Plan to read more about both of these NEW pre-made templates, made by... ME!


FYI, coming soon...
A few of my favorite bloggers are going to guest post on here. Can't wait to see what they share.


Friday, March 16, 2012

Anchor Chart Linky Party.


I am pretty frustrated because I lost the fabulous post I spent an hour writing last night.

So this is not my original post but hopefully you will get the gist. Here is a bit of a post I posted about a month ago sharing how I teach my Kinder ELL  kids how to use beginning, middle and ending leads/ sentence starters/ transition words in their writing.
I teach leads as "Story Starters". They "lead" the story, like our line leader. We talk about good ways to start a story and how it is pretty boring to always start with "I". "We", I, brainstorm possible ways to start our stories, out loud and create a list. I type the leads on my laptop and have my kids watch. I started doing this this year, because I realized my students weren't recognizing my anchor charts after I had typed them up. This way I have a clean poster that the students recognize. The story starters are mounted on green construction paper to match the train's engine. (For more on the color coding please visit the original post, Beginning, Middle, and End.)
In a few days time I introduce transition words. No surprise they are also color coordinated to match their cars.
I realized once I had them up I should have added the trains to them too. Oh well, they color will have to be enough.
Finally, (like my transition word?) I also print these on colored paper and place on the board for easy referencing.
Most kids won't use transition words. Only the really quick kids will pick up on it. However, I find that having them up and referencing them when I model writing really helps my students understand what I am talking about. They start to use them when they are talking, which is a fantastic side effect for me as an ELL teacher.
So a freebie for you... the transition posters. Just click on the links below to get a copy for your room.
If you have some time you might want to revisit the original post, as I share some writing tips and freebies.

Can't wait to see what you have to share with us. Please link up Kinder thru 2nd grade anchor charts below.


Please remember that if you have a 3rd thru 6th anchor chart hop on over to Kristen's blog to link up there. Just click on the button below.

Wednesday, March 14, 2012

Class Decor Help

I realize I still have a whole quarter, plus all of summer to think about this, change my mind, be inspired and then change it again, but I have gotten an itch. I have been thinking of what kind of decor I will use in my classroom next year. Am I the only one? Have I lost my mind?

I though I had this all settled. For the past 2 years, I have used a Rainbow Stars theme. It was perfect because I could use all of Creative Teaching Press Poppin Patterns Stars products. I love this theme, one because I love rainbows and stars, the perfect combination. I use a dark background, like navy or black and the rainbow boarders.

 Then Creative Teaching Press came out with the Dots on Chocolate theme and I fell in love all over again. Because I am in two different schools this year, I could try out my new theme... a surfing theme.

I fell in love with the surfing theme and was all too ready to continue this until I saw Schoolgirl Style's Lemon Chiffon theme.

I started to get an itch. I am totally in love with the grays and yellows this year and although I this color theme might be a bit more of a challenge, I could totally love it. However, I think I will wait a year or two until I can pull it all together. BTW, Schoolgirl Style is having a sale in her Teacher's Notebook shop today only, so if your interested, today might be a great day to purchase some goodies.

My real struggle is because of a recent trip to Hobby Lobby where I found these gorgeous rainbow stars on black boxes and matching ribbon.
 It made me totally want to keep my current theme. Now I am super confused. So I thought I would bring it to you so you could help me decide.
 
If you click on the images on the right it will enlarge a picture of the theme.

<a href="http://www.sodahead.com/fun/what-theme-would-you-like-to-see-in-my-class-next-year/question-2517905/" title="What theme would you like to see in my class next year?">What theme would you like to see in my class next year?</a>

I do ask that if you would like to leave a comment please do so in the Blogger comments section, not the Widget.
Thanks for your help.

Tuesday, March 13, 2012

Anchor Chart Linky Party!

Hi Everyone!
Have I got a goody for you!
Kristen from Ladybug Teacher Files

and I are collaborating to bring you an anchor chart linky party. 
So get your cameras ready, and start snapping pictures of your favorite, or most useful anchor chart.
Get ready to share on Friday, March 16th.

Because Kristen works with older kids she will host anchor charts for grades 3rd thru 5th on her blog, Ladybug Teacher Files.

I will host anchor charts for grades k thru 2nd on here.

 Hope to see you there.

Saturday, March 10, 2012

Organization Project Week 8: Thematic Units

It is perfect that the Thematic Units linky party opened today, because I spent the day working on organizing my thematic units. It was our last day before  our Spring Break, next week. I wasn't going to do any heavy lifting today, so I took advantage and put my practicum student to work... with the kids. While I worked on de-cluttering my teaching materials.

I got these fantastic tubs from Really Good Stuff, last summer. I have had plans for them for a couple of years now, and when I was able to get my hands on them, I didn't have time to put them to good use.
Until now...
As you can see they were just filled with random items I was trying to hide. I purchased 4 boxes so that I could have one for each quarter. So the first thing I did was empty them out and give them a fancy new cover page.
 I didn't want to laminate the sheet in case I was going to change them.
 However, I didn't just want to stick them on with tape.
 So I used a page protector.
I used different backgrounds, but I am pretty sure I will be changing them so they are all uniformed.

Next, I wrote out all the themes I could remember by quarter. Ie: Q1: Back to school, Names; Q2: Halloween, Thanksgiving, Veterans day, Holidays. You get the point. Then I used that information to create labels using Post-It notes, like Kristen showed just a few days ago.

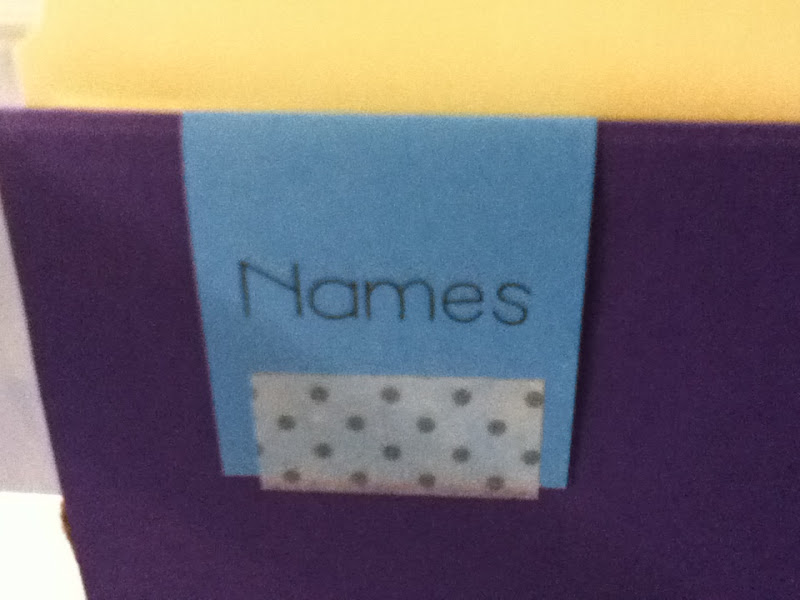
 I would then attach these labels to my purple hanging files. What I didn't realize was that I did not want to put tape on the hanging files just in case I wanted to change them around. Regular tape would not work either. What should I use?

Some WASHI TAPE!
 
What I love about Washi tape is that it removes easily, so don't worry about mistakes. It is also pretty sticky, and is super cute.
I didn't have to stick the back down because that was the part of the sticky note that had the adhesive on it. It worked out great.

As a side note, I was going to stagger the tabs but I didn't like the way they looked. So I I left them all on the left side. So if I move any of the units around, the tab would not be out of place.

Finally, I was able to file away all of my great activities and units. What I did learn was that I did not want a box per quarter. I am going to change them so one is for the first semester, Q1 and Q2. The second will be for the 2nd semester, Q3 and Q4. The third box will be for the letters of the alphabet, Sight wd, and HFW work. Basically for Kindergarten. The final box will dedicated for phonics and parts of speech units. Mainly for 1st grade.
However, I am super happy that I got the bulk of it done and all I have to do is some rearranging. I did notice, as I was filing, that I forgot some units, so I will have to go back and make some more labels. No problem now, that Kristen made the template and explained it all for me. 
This is where I will start from when we get back from Spring Break.

Here is a final picture of them all stacked up and pretty. Please ignore the hot mess to the left and right. It is still a work in progress.


 What I love about this is that I will work out of one box and when that is done I can close it up and bring up the next one. No longer will I go crazy looking for a particular idea/ activity. Now it is at my fingertips.

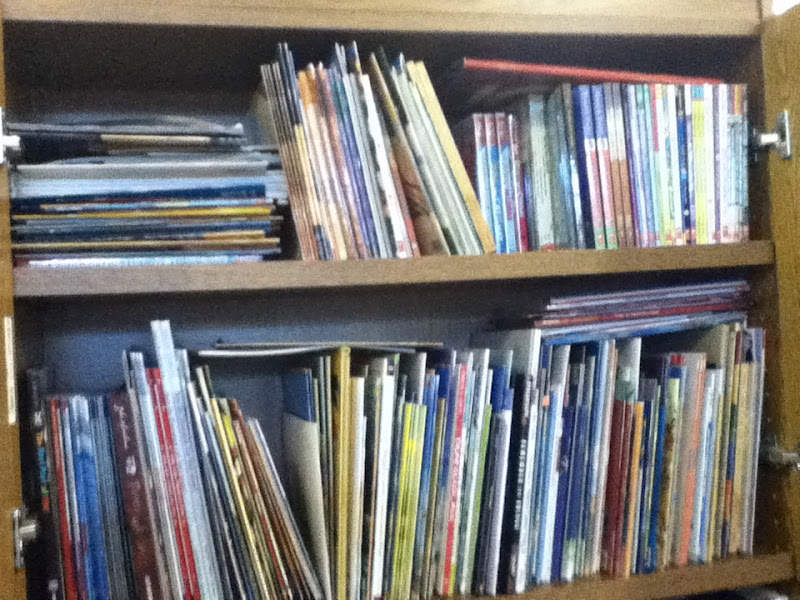
The downfall? I can't add my books to the folders and tubs. However, I like the way I store my read aloud books. I just have to organize and label them better.
 However, this is a project for another day.

Don't forget to hop over to the Clutter-Free Classroom and check out all the other fab organization projects.

Have a great weekend. I hope to catch up with some more posting next week.

Wednesday, March 7, 2012

Student Art Feature: Symetry Creatures

I found these little creatures out side of the 1st grade pod in school B. I thought they were sooooooo cute.
I have done symmetry art before but I never took it further and had the kids create/ imagine something more. What a wonderful idea.
Here is how they did it...
First the kids folded their paper in half.
Then they added small blobs of paint to one side of their paper.
After it dried, they came back to it with a black marker and added the faces, hands, arms, legs. Anything they wanted.
If you want you could have them draw it in pencil and then trace in black marker, just in case they make mistakes.
You know how picky some kids can be.
I imedietly thought of an extension ideas for writing. What is it's name? Where did your creature come from? How old is it? What does it eat? Where does it live? Write a story about your creation.

Have a great day.